
In the beginning of 2016, I shared my setups for work, blog, personal, and on-the-go planners in a 4-part blog post series. Going into the second quarter of the year, I—like many plannernerds—am doing a self-check to determine what’s working and what’s not working so I can adjust as needed. As I’m going thru this process, it occurred to me that it’s not as simple as choosing a planner product but rather there’s one critical step you must take BEFORE choosing any planner otherwise it will not work. What is that critical step?
Background
When it comes to planning, I have a thought process I like to go thru to figure out my planner setups. First, I identify key life areas, currently they are: work, blog, and personal (which also includes family, home, and fitness). Next, I determine if each life area requires its own dedicated planner, for example: appointments and tasks for my regular day job do not carry over to my personal time so I can dedicate a separate planner for work which stays in my office. Finally, I try to choose a planner product that I think will work best for each dedicated planner. This approach has worked moderately well for years—sometimes it’s a hit, sometimes it’s a miss. For those times when it’s a miss, I end up wondering, “What am I doing wrong?“. I couldn’t quite figure it out.
My Epiphany
This weekend while on a Skype call with some planner friends, we started talking about planner page layouts. I’ve been using planners for a long time (read more about it here) but it wasn’t until a few years ago when I used an Erin Condren planner for the first time that I realized how much better a vertical column layout worked for me than a horizontal layout AND that a weekly layout provided better oversight than a daily page AND that a Monday start was brilliant! As a result, I enjoyed ‘planner peace’ with the Erin Condren planner for a few years (that is until I got frustrated with the spiral binding because I couldn’t add or remove anything and decided to go back to a ring binder—also using a week-on-2-page, vertical layout).
As I was sitting there on my Skype call, the question came up about our ‘ideal’ page layout. Without hesitation, I mentioned that a week-on-2-page, vertical layout was ideal and extremely versatile for many uses. I went on to describe how I use 3 different vertical layouts for each of my life areas:
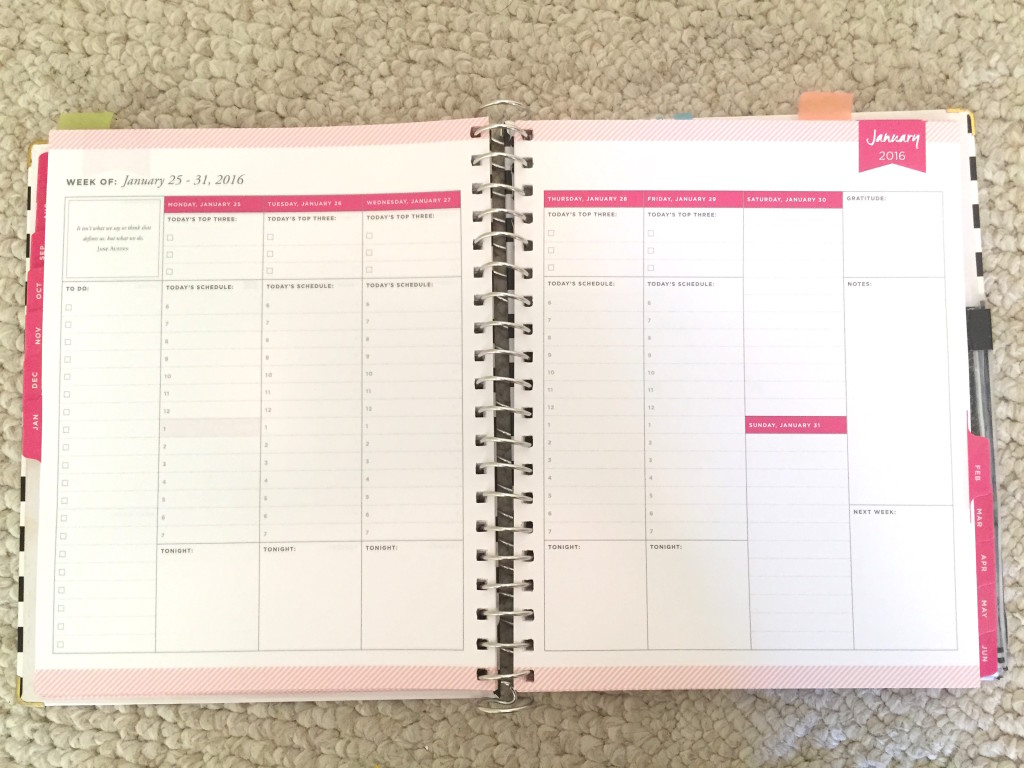
- Work planner: my work schedule is appointment driven, tracking tasks for various ongoing projects so I use a vertical, week-on-2-page layout with condensed weekends (since I don’t need the weekends, I use these boxes to log weekly project updates), a timed section spanning from 8am to 5pm on the Monday to Friday columns,with extra space at the bottom for tasks and notes, and an extra full vertical column for weekly tasks—any extra writing space, I consider a bonus!
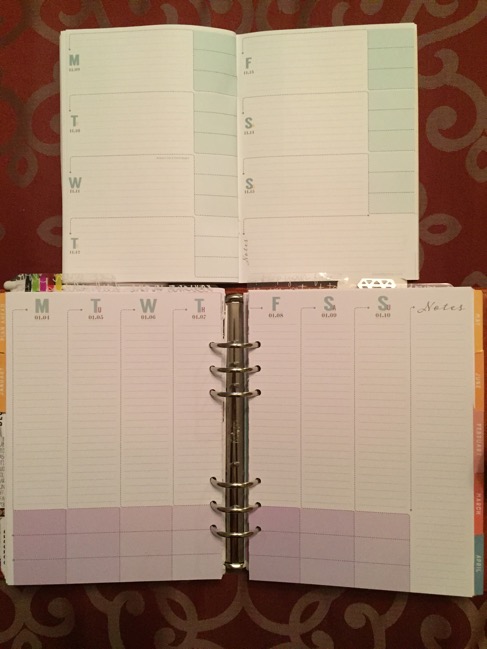
- Personal planner: my day is mostly task driven with a few appointments so I use a vertical, week-on-2-page layout with equal size columns for the weekends, each with 2–to-3 boxed off areas in each column to track special items (e.g. water intake, exercise, weather), and one extra full vertical column for weekly tasks. (see picture above alongside blog planner)
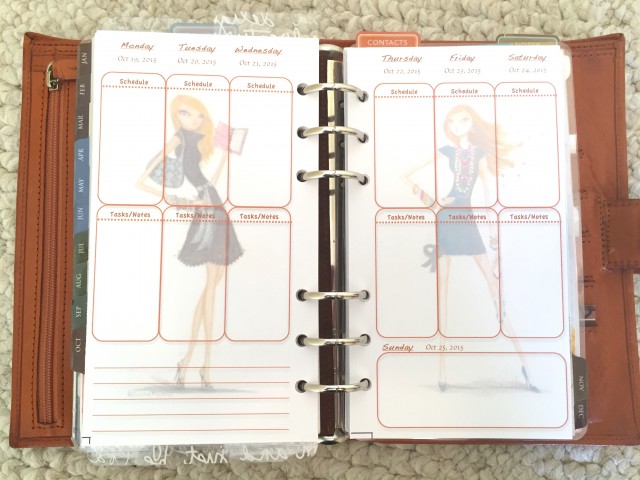
- Blog planner: I started the year using a horizontal layout (see picture of old horizontal layout above alongside personal planner)—I know, what was I thinking?!—which hasn’t worked quite right so I designed my own week-on-2-page, vertical layout that I’m currently ‘test driving’—if it works out, I’ll share it in a future blogpost!
Regardless of the planner size, this has been my ‘magic formula’, buried deep in my subconscious that easily rolled off my tongue as naturally as breathing. That’s when it hit me: the critical component of any successful planning system is the LAYOUT dictated by your needs! Unfortunately, most people approach the process in reverse, walking aimlessly thru the office supply store or clicking around a website trying to choose the planner they think MIGHT work.
Before you buy anything, you have to know what layout you NEED then you can easily filter out what doesn’t apply. For me, shopping for planners has gotten so much easier because I check if it’s a week-on-2-page layout: No? Move on. Then take a peek at the layout: Not vertical? Move on. If it’s vertical, I’ll analyze the page format: spacing, sectioned areas, any special features (e.g. water tracking, checkboxes, non-traditional labels, etc.) to see if it’ll fit my planning needs.
Choosing Your Ideal Layout
So how do you determine your ideal layout? Last year, I wrote a blogpost series that walked you thru the process of choosing a planner. The very first ‘baby step’ was focused on two basic principles: write everything down and look at it every day. Why? To help you identify what you need to track, how you track it, and your overall planning style (e.g. time scheduler, list maker, note taker, etc.)—read more about it here. I then proceeded to explain the different planner options and configurations available on the market so you could evolve your system from a beginner setup, to an intermediate setup and, ultimately, an advanced setup. Remember, your planning needs should dictate your page layout, not the other way around.
When in doubt, draw it out!
What if you don’t find your ‘ideal’ layout? Oh my, I’ve been there too—the struggle is real! There’s been times when I saw a planner notebook or page insert and thought, “ALMOST perfect! If only this part here was different!” I’ve tried LOTS of planner products from LOTS of different brands—more than I care to admit!—so I’ve seen and experimented with lots of different layouts. My recommendation is if you’re not finding a layout that works for you, then design it! Use whatever tool you have available. I’ve used Microsoft Word, Excel, and Publisher to design numerous inserts and specialty templates over the years so any basic word processor or spreadsheet program will do. I’ve also used blank graph notebooks and used the boxes as a guide to draw out my sample layout—the little boxes help you draw straight lines and it keeps it looking very neat! Don’t worry about making it look pretty at first, just focus on sectioning the page the way you need it, print it out, and try it out for a few weeks to see if it is indeed your ‘magic formula’. If it works out, then finalize the layout and print it out or take it to your local office supply store to have them print and bind it into the notebook format of your choice—voila!
Custom Purchases
If you’re not comfortable using software programs or don’t like the idea of drawing it out, there are companies now on the market that provide products or tools to create a custom planner. You can either design your page layout or add custom divider sections for things like meal planning, fitness, home, etc. so just Google ‘custom planners’ to find them or check out your local craft supply store for more information. Etsy, an online marketplace, is another wonderful option where you’ll find many small business owners who sell their custom designed inserts and a few even offer the option for special orders where can you specify what you want and they’ll create it for you. Bottom line, if you’re willing to pay a little more, you can get exactly what you want, how you want it.
Summary
We all strive to manage everything going on in our life as best we can and planners are tools that help make this easier but only when we’re using the RIGHT tool—our ‘ideal’ planner page layout dictated by our needs. The tendency is to look for the ‘quick fix’ and grab the first planner we see but this approach can work against us. Instead, we need to take a step back to analyze our planning needs—what we track, how we track it, etc.—so we can specifically CHOOSE the best planner for the job.
What about you? What do you look for when choosing a planner? Have you found your ‘ideal’ layout or are you still trying to figure it out? Do you have any other tips for figuring out your ‘ideal’ layout? Share your thoughts in the comments below and don’t forget to like, share, and subscribe!
Until next time, 🙂
♥ LilD ♥
Your weekly layout looks amazing, very elegant and extremely functional at the same time…
Thanks! I try to make it aesthetically pleasing to make my workload easier to digest. 😉
I too like a vertical layout. I am currently in a passion planner compact size. My preference is to have a week on 2 pages with a Monday start. Currently the PP has a Sunday start which I am living with this year. I love the size and overall layout, but not liking the Sunday start or the set times. I like to write in my own times. So I may invest in an Ink Well Press planner for 2017. My only concern is the size.
Hi Diane,
That’s another thing I forgot to mention–I’ll have to add it to my post–is how a Monday start was life changing for me! It made planning so much easier because that’s how we mentally separate our weeks but it didn’t ‘click’ until I used the Erin Condren planner.
In regard to the size, Inkwell Press now has a new smaller size–approx 7″ x 9″ –as well as A5 size quarterly booklets. If that doesn’t work for you, check out Agendio.com –a company I just learned about and am trying out (look out for a future blogpost!) which not only allows you to customize EVERYTHING on the page but offers a wide range of sizes for bound AND ring planners–genius!
Thanks for commenting and hope this helps! 🙂
LilD
Yeah! We Are vertical ❤️ But recently I change becouse … Why not? I want to try something else. But for work definitively an houlry planner is my first choice. I should check out Lifeiscrafted planner I really like her A5 version 🙂