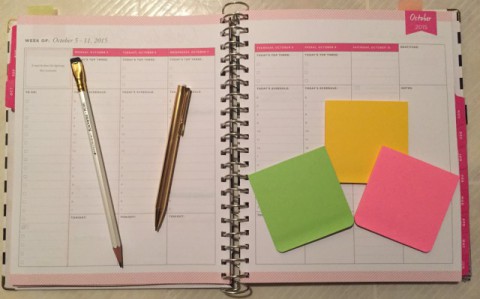
Welcome back to the next installment of the ‘Planner Overload’ blog series! Last week we reviewed the ideal setup for a ‘beginner planner user‘ to help you get started using planners. Hopefully by now you feel more comfortable with a planner, have–hopefully! 🙂 –developed a habit of consistently ‘writing things down, looking at it everyday’, and gained a better understanding of all the tasks and activities requiring your attention. This understanding will reveal a few things about your planning ‘style’ in order to help you determine the type of planning system you’ll need as an intermediate planner user like:
- Are you an copious note taker? Set up a separate section dedicated to ‘Notes’.
- Were there pieces of information that you constantly needed to refer back to? Set up an A-Z index section to catalog important information and make it easy to find.
- Did you constantly run out of room each day? Either look for a page layout that has a larger area for the information you capture the most (e.g. appointments, tasks, or notes) or choose a layout that dedicates an additional page per day (e.g. if you’re using a week-on-2-pages layout, try a day-on-1-page layout; if you’re using a day-on-1-page layout, try a 2-pages-per-day layout).
- Were you able to find vital information you needed easily within the page layout? Try ‘color coding’ to help visually differentiate information and make it easy to find on a page (e.g. assign a color to each member of your family and record their activities using the assigned color; a more simple approach would be to use a highlighter or red pen to only call attention to important information like a doctor’s appointment, payment, order placed, etc.)
- Did you find yourself constantly recopying tasks to another day/week? Either setup a weekly task list on a sticky note which you can move week to week or a separate section dedicated to ‘Tasks’. If you decide to set up a separate section, I recommend having two task lists: an ‘Active Task List’ for tasks to be completed in the near future and a ‘Master Task List’ for tasks that don’t have a defined completion date (some people call these ‘someday’ tasks)
- Were you comfortable with the page layout you chose–daily, weekly–or were you struggling to make it work? If you found the page layout overwhelming (e.g. most of it was left blank or completely filled to the brim) then try a different format with smaller areas to minimize the blank space or larger areas to accommodate more information.
- Did you lack motivation or interest to use your planner every day? Try to figure out why:
- Was the size of the planner wrong? If it was too big, then it’s less portable and you wouldn’t have it when you need it; if it was too small, there probably wasn’t enough room for notes.
- Did the planner reflect your aesthetic? Some people like planners that are simple and classic, others prefer bright colors or pretty patterns. Try to make the process ‘exciting’ by using a planner you love and carry your favorite pen, clips, post-its, etc.
- Did you carry other items to supplement your planner like a notebook, folder, specialty paper, etc.? Some people need more flexibility and tools within their planner to make it work so if it’s not possible to add these components to your basic planner, it’s definitely time for an ‘upgrade’.
You probably figured out by now that going thru the ‘beginner planner setup’ phase was an information gathering process to help you identify your workload, how you think, and what you need. With that information you can decide if you just need to make slight adjustments to your current setup–a basic setup works well for many people–or have the ability to customize the planner to fit your specific needs. To summarize, the basic setup for a ‘beginner planner user’ consists of:
- a spiral, wire, or book bound planner
- in the desired format (e.g. week-on-2-pages, day-on-1-page, day-on-2-pages)
- in the optimal size (e.g. small, medium, large)
- with the page layout that works best for you (e.g. timed/untimed appointments, tasks, and notes areas sized appropriately for your needs)
- your favorite pen or pencil
- your favorite Post-its

Next week we’ll review the custom options available on the market today for ‘intermediate planner users’ wanting a more personalized setup.
Do you use a basic setup? For work or personal or both? Share in the comments your love for ‘keeping things simple’ and why it works for you!

What is the planner pictured in this series and where can I buy it please? I can’t find this layout anywhere.
Hi Isabel!
It’s the large black & white striped academic planner by Day Designer sold this year at Target.
Hope this helps!
Lil D
One more thing Isabel. If it’s the weekly page layout you’re looking for and you can’t find the Day Designer anywhere, check out Franklin Covey online–they have weekly planners with a similar page layout.
Thanks for visiting my blog!
Lil D 🙂
Thank you again for more thoughts and ideas, they are a great help to me in getting started.
Again, so good to hear that, John! One step at a time. 😉